3.1. ABB RobotStudio
ABB RobotStudio is the IDE used to program ABB Robot. It can be downloded from ABB website. In the following examples IRB2600-12/1.85 6-axis industrial robot is used. The model is IRB2600 with a payload of 12Kg and a working range of 1.85m.
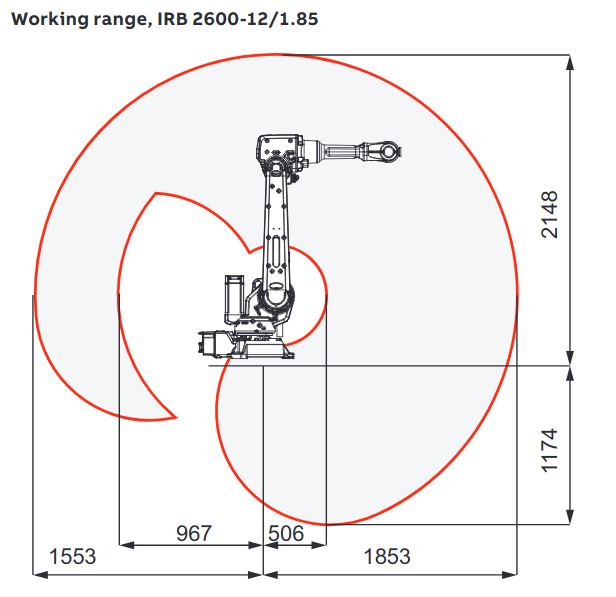
IRB2600-12/18.5
3.1.1. New Virtual controller
The following video show ho to create a new virtual controller from scratch. The virtual controller once created, can be run. It show also how to create a module where we declare the main procudre, that is the starting point of robot program.
The robot program entry point is called “main” by default. It can be changed, at this point you need to information the controller about the new entry name. This is done in “Configuration - Controller - Task” under the column “Main Entry” write the desired name.
3.1.2. Jogging
Jogging is used to move the robot in manual mode using the teachpendant joystick. In order to move the robot, the key on the electrical cabinet should be on manual position, motor are inserted and the deadman switch is always hold.
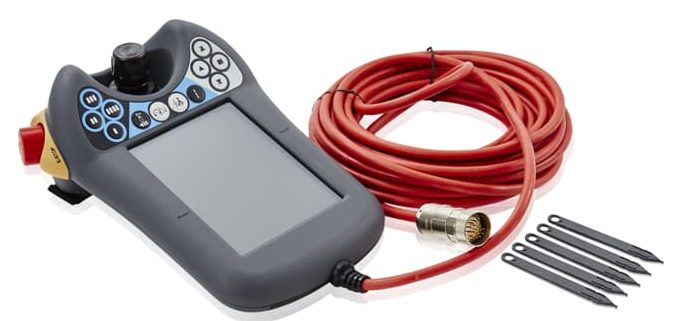
ABB teachpendant
The real teach pendant is the same as the virtual felxpendant of RobotStudio. On the virtual one you can find the operating mode key and the motor pushbutton. In a real robot theycan be found on the eltrical cabinet of the robot.
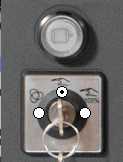
White pushbutton for motor insertion. Operating mode key.
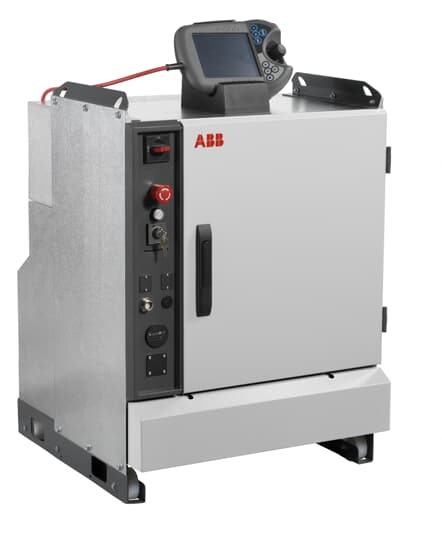
ABB cabinet controller
Robot motion is done usually in 2 spaces: Cartesian space or joint space. In joint space single axis, or motors, are moved independently. In cartesian space, the robot tool, TCP, is moved in the 3D space.
The following video show how to use the joystick in order to move the robot.
When moving in joint space no need to select the tool neither the workobject, cartesian reference. But when moving in cartesian space you need to select which tool you are moving and in which cartesian reference.
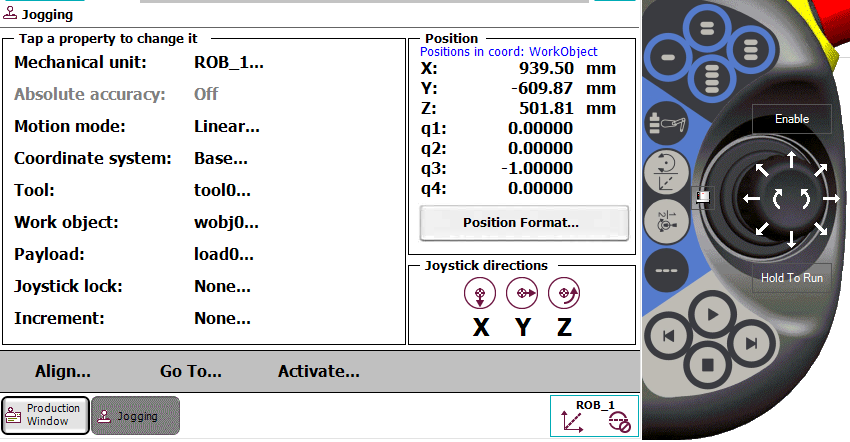
Jogging screen
A third way of moving a robot is relative the coordiante system of its tool. The ‘’Reorient’’ mode allow to rotate the tool arround the origin of its coordiante system about its three axis.
3.1.3. New virtual controller from a backup
A virtual controller can be created from an existing backup of a robot. The backup can be of a real robot or another virual controller.
When creating the virtual controller from a backup, RobotStudio only define the robot model, the verision of robotware and other options. The program is not loaded to the virtual controller. In order to load the program, you need to restore the backup as shown in the video. In order to modify any thing in the robot, program or configuration, you need to “Request Write Access”.
3.1.4. Write a program
Once a controller is created, the program can be written in the IDE. The program can be divided in Modules and Routines (Procuderes and Funcions).
The video show three instructions written in the main procedure. It show also how to run the robot in RobotStudio. The same way can be used on a real robot.
3.1.5. Example
Open an already existing virtual controller and copy the following code snippet in the main module.
MODULE MainModule

    CONST jointtarget homePos:=[[0,0,0,0,90,0],[0,9E9,9E9,9E9,9E9,9E9]];


    CONST robtarget pos1:=[[940,-600,500],[7.96406E-9,-1.38131E-7,-1,-1.64709E-7],[-1,0,-1,0],[9E+9,9E+9,9E+9,9E+9,9E+9,9E+9]];
    CONST robtarget pos2:=[[800,500,400],[4.09193E-9,4.64768E-8,1,1.56834E-7],[-1,0,-1,0],[9E+9,9E+9,9E+9,9E+9,9E+9,9E+9]];


    PROC main()
        !
        MoveAbsJ homePos,v1000,z50,tool0;
        !
        MoveL Offs(pos1,0,0,300),v1000,z30,tool0\WObj:=wobj0;
        WaitTime 0.2;
        MoveL pos1,v1000,fine,tool0\WObj:=wobj0;
        WaitTime 0.2;
        MoveL Offs(pos1,0,0,300),v1000,z30,tool0\WObj:=wobj0;
        !
        MoveL Offs(pos1,0,0,300),v1000,z30,tool0\WObj:=wobj0;
        WaitTime 0.2;
        MoveL pos2,v1000,fine,tool0\WObj:=wobj0;
        WaitTime 0.2;
        MoveL Offs(pos1,0,0,300),v1000,z30,tool0\WObj:=wobj0;
        !
        MoveAbsJ homePos,v1000,z50,tool0;
        !
        Stop;
    ENDPROC

ENDMODULE
Usually a program is prepared offline, then transferd to a real robot. Target positions are Usually taken from mechanical layout, and they don’t match the real ones.
During commisiong the position need to be adjusted. The robot is moved manually, by jogging, to the desired position and the position is saved, teached, in the relative variable.
Teach a position
……… video coming soon
3.1.6. Robot Pointers
ABB robot have two kinds of pointers: Program Pointer (PP) and Motion Pointer (MP). The PP is shown as an arrow, and the MP as a robot icon. The Robot controller, in some cases, can execute several instructions following a motion instruction while is moving. In this case on the program editor you can see the Motion pointer on a motion instruction while the program pointer is on following instructions.
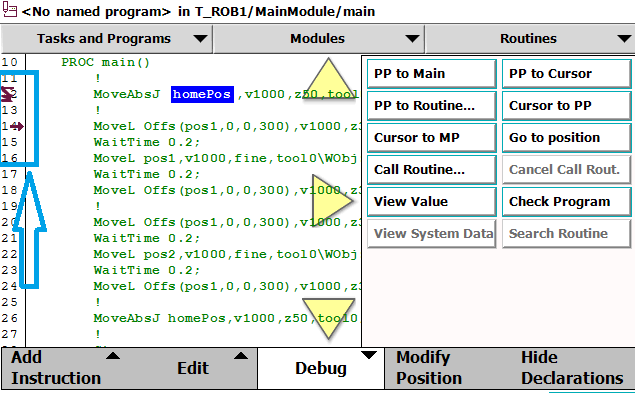
Program Pointer (PP) and Motion Pointer (MP)
During commissioning, sometimes you need to skip some instruction or go back to execute previous ones. The program pointer can be moved on a desired line. In the program editor select the line where you want to move the pointer then select “Debug - PP to Cursor”. This can be done only in order to move the pointer to other instructions within the same routine.
A single routine can be selected in order to run it. In this case select “debug - PP to Routine” then select the desired routine.
The pointer can be resetted to the first instruction of the entry point, to the main procedure. To do so select “Debug - PP to Main”.